Contents
- Index
- Previous
- Next
Digital Target Scoring
Although any screen resolution will work, the Target Scoring Software was designed to work best when displayed with a Screen Resolution of 1600 x 900 format or any resolution of 4 units wide by 3 units high.
To change the screen resolution, right click on the computer desktop, select properties, click the settings tab and use the Screen Resolution slider to select the desired resolution.
To open the Digital Target Scoring module:
Open the Target Record tabbed page, click the New Target button, enter the range, in yards, to the target and click on the Shot Record Tab or Button to open the Shot Record page.
From the Shot Record page, click the Digital Target Scoring Button to open the Target Scoring module.
First, You will need to construct a scoring target that matches the screen resolution of your computer. This will need to be done only one time.
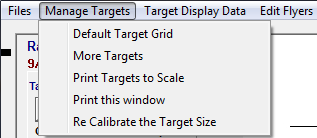
At the upper left of the form, click the "Manage Targets" menu item then select "Re Calibrate the Target Size" to open the Calibration Module
Click the button titled " Calibrate the Monitor Horizontal Axis "
Using a ruler or calipers, extend or shorten the horizontal line until it measures exactly two inches.
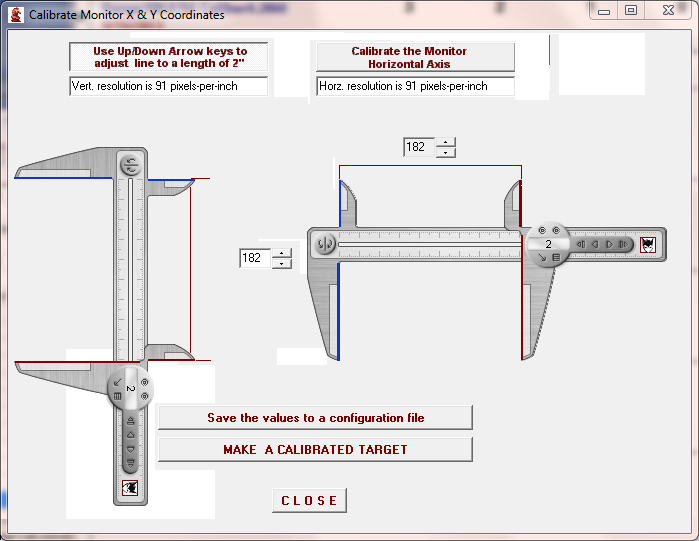
Then click the button titled " Calibrate the Monitor Vertical Axis "
Extend or shorten the vertical line until it measures exactly two inches.
Click the button titled " Save to Configuration File".
Click the button titled " Make a Calibrated Target ", The software will construct a target grid that will display
coordinate lines that are exactly one inch apart when displayed on your computer monitor.
A message will be displayed indicating that the target has been constructed and saved to your "Targets" folder.
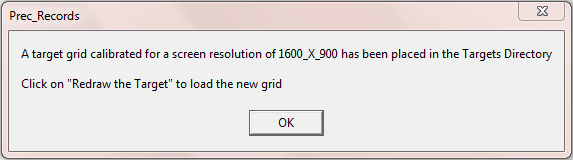
Click the "CLOSE" button then click the "Redraw the Target" button to load the newly constructed target.
Before attempting to score a target or place shot coordinates on the screen, be sure that a Load has been selected or created on the Load Page and a NEW TARGET has been selected in the Target Record page and the range distance, in yards, to the target has been entered.
Also, to ensure that calculations are correctly performed, the bullet Weight and Ballistic Coefficient should be entered into the Load Bullet Data Page. (If the Bullet Ballistic Coefficient is not known, enter " 1 " so that the calculations do not attempt to divide by zero.
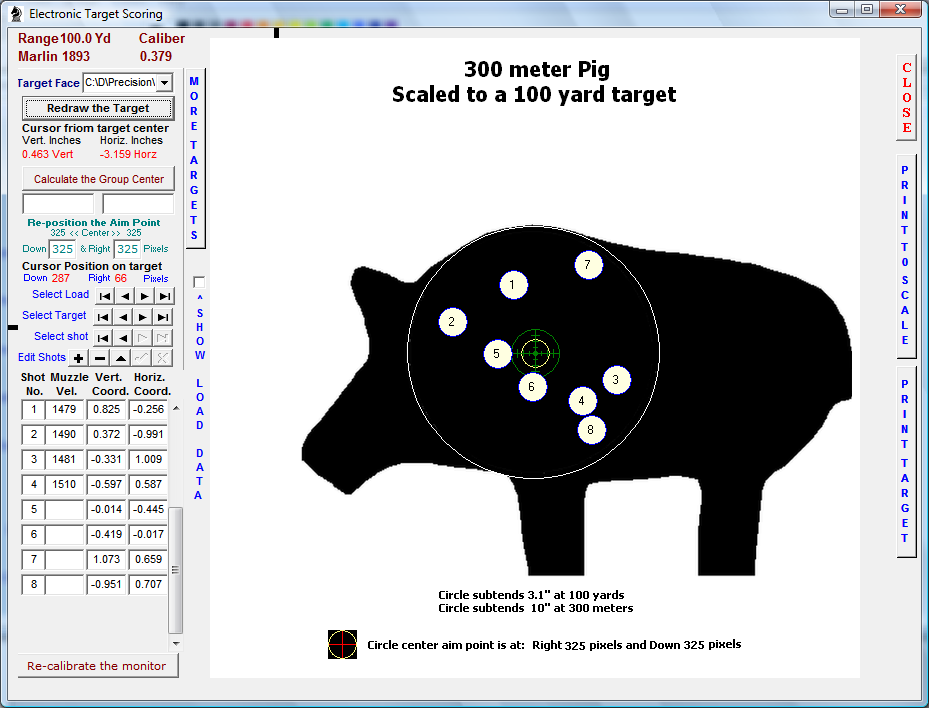
When a new, blank target is on the screen, the cursor will be represented by a set of small concentric circles.
Place the cursor on the target center and left click. This will place an AIMPOINT  on the target
at the point where the cursor was clicked.
The Coordinates of the aim point will be shown in the two windows in the left panel as Down and Right from the upper left corner of the target.
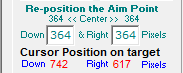
The label will indicate the exact center of the target and the Edit Windows may be edited to reposition the at the Exact Center or anywhere on the target in order to show bullet holes that are considerably off center on the target.

The cursor position from the Aim point will be constantly and dynamically displayed in the upper portion of the left panel and the cursor position from the upper left corner will be constantly displayed in the left panel under the label titled "Cursor Position on target"
The cursor position will also be indicated by the dynamic display of black bars on the Top, Bottom, left and Right of the Target Scoring Page.
Use a pen or pencil to punch a hole through the exact center of the aim point of a the target too be scored with bullet holes that are within the boundaries of the screen grid or target.
Hold or tape the target to the computer monitor so that the center of the Target Aim point is visible through the center hole punched in the of the target.
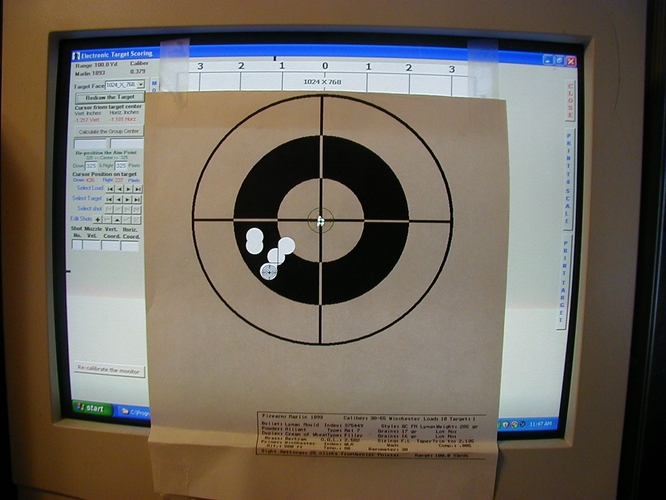
Finally, move the cursor until it is centered under each bullet hole in the target and left-click the mouse once under each bullet hole. The coordinates of each bullet hole will be calculated and recorded in the grid at the left of the page. A circle scaled to the correct bullet size will be drawn on the screen target that is beneath the paper target..
Once all the bullet holes have been entered and recorded, remove the target and click the button titled " Calculate the Group Center"
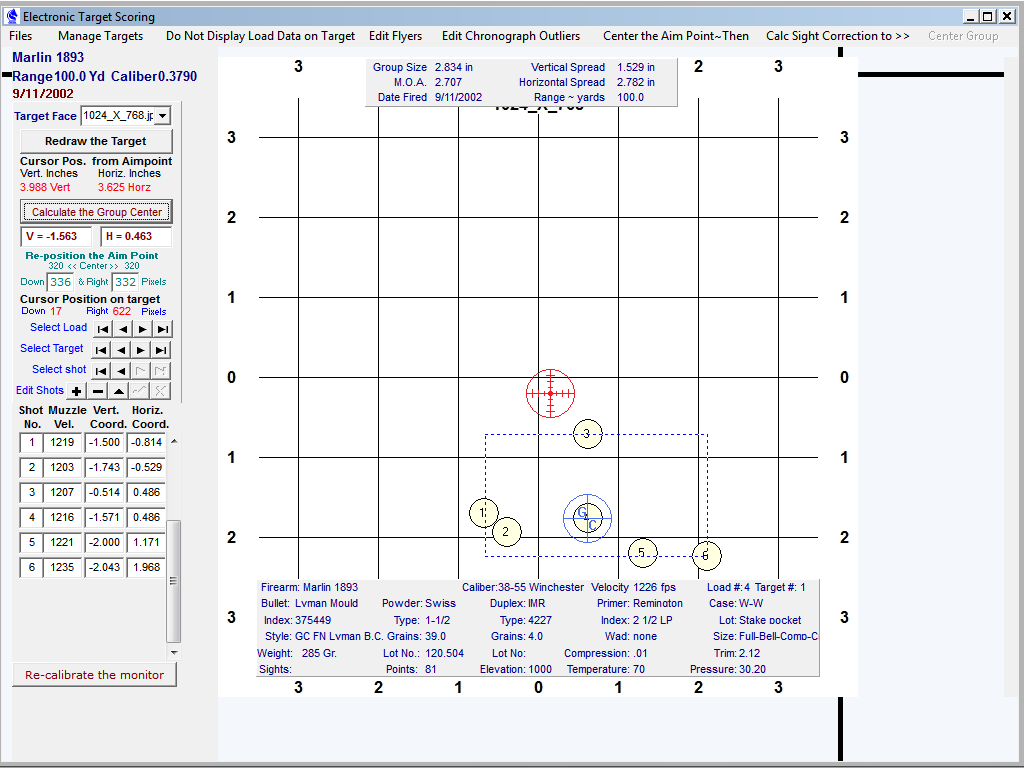
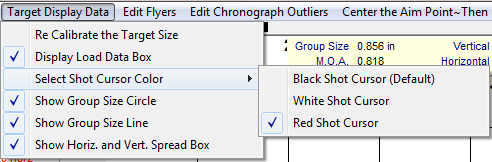
Several options for displaying and evaluating the shot group are available in the "Target Display" menu item.
After the Aim point has been centered on the target and, if the correct values for the firearm have been entered for the windage and elevation sight adjustments, the software can calculate the required sight adjustments to bring the group center to the desired point of aim.
Select the menu item titled "Calc Sight Correction to>>"
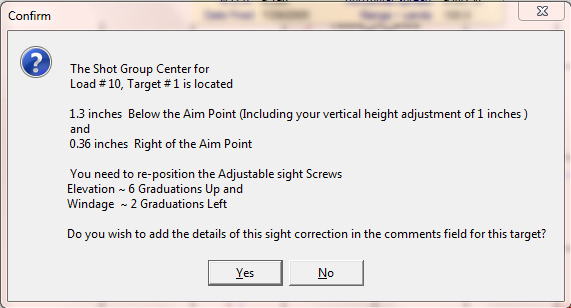
After the required sight adjustments are determined, the sight adjustment values may be recorded in the Target Comment window.
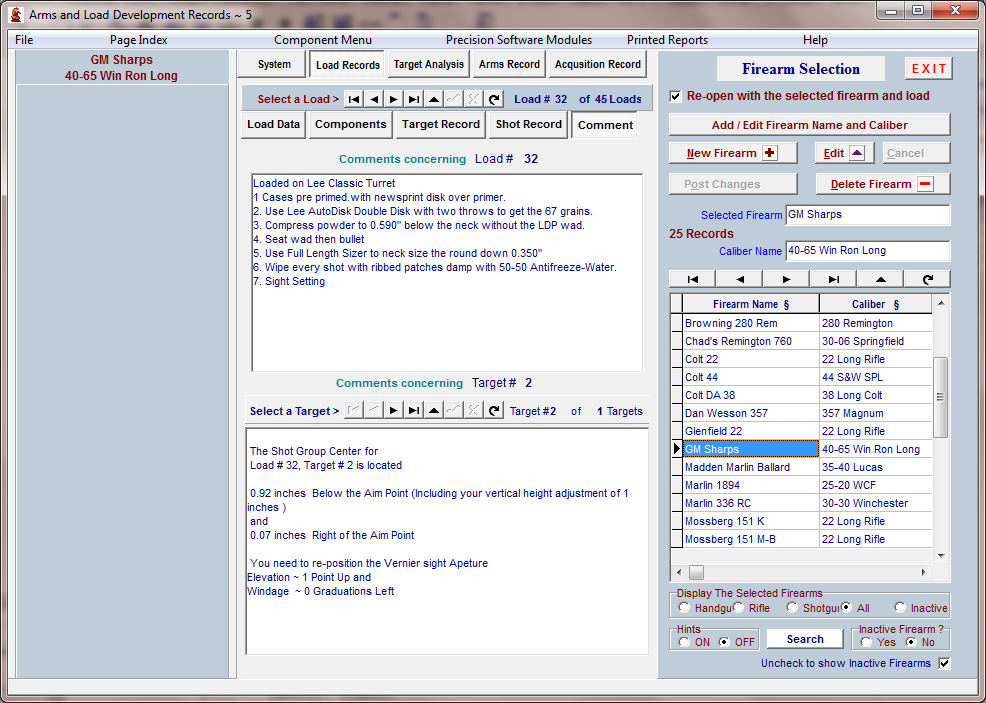
Once the sight adjustments are determined and recorded, the software can re-calculate the shot coordinates and re-draw the target to display the shot group as it would be if the sights had been properly adjusted when the group was fired.
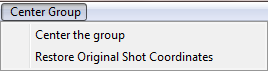
The original shot coordinates are recorded and the target may be restored with the original coordinates.

The re-calculated shot coordinates with the group center as close to one inch above the target aim point as the sight adjustment values will allow.

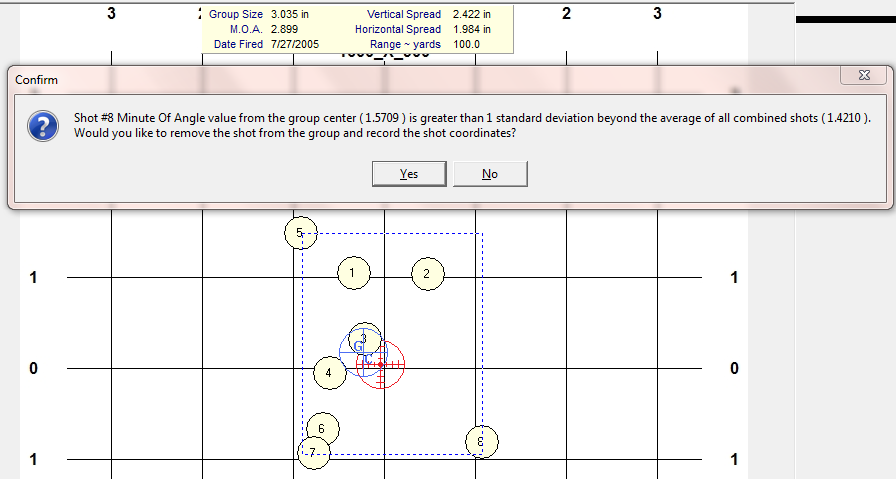
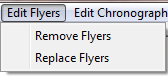
Statistical analysis of a shot group containing more than 6 shots can detect theoretical fliers in the group. Click the "Edit Fliers" menu item to remove those fliers.
The removed fliers can always be returned to the group by selecting the "Replace Fliers" menu item.
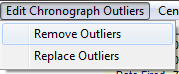
Statistical analysis of the Chronograph velocities can also detect theoretical "outliers" within the range of velocities recorded. Click the "Edit Chronograph Outliers to remove those velocities.
The removed outliers can always be returned to the display by selecting the "Replace Outliers" menu item.

Click on the "More Targets" button to open a selection of targets that are available to place on the screen.
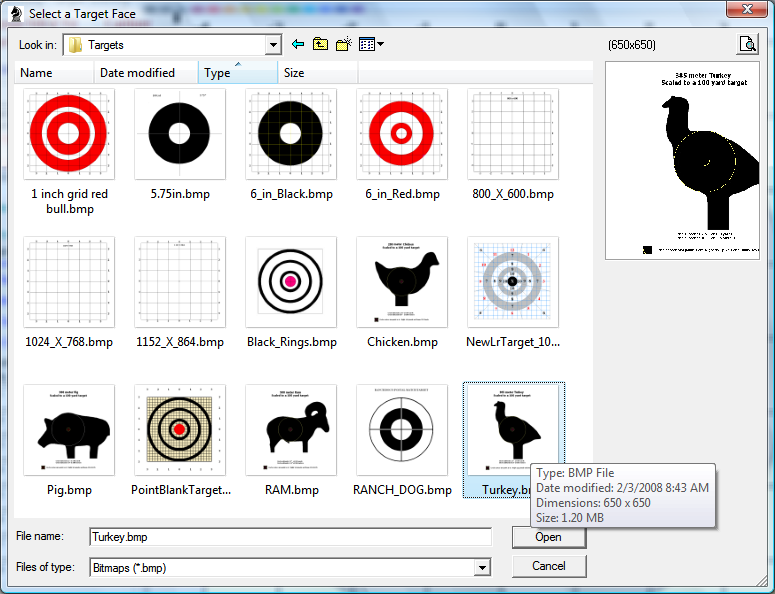
A graphics program such as Window's Paint may be used to create targets that may be used.
For users of Screen Resolutions of 800 x 650, make the targets 507 pixels wide x 507 pixels high
For users of Screen Resolutions of 1024 x 768, make the targets 650 pixels wide x 650 pixels high
For users of Screen Resolutions of 1152 x 864, make the targets 731 pixels wide x 731 pixels high
Copyright © 2002- 2016. TMT Enterprises. All rights reserved. Modified June, 2016