Contents
- Index
- Previous
- Next
Print Scale Targets
This print module is accesed from the Digital Target Scoring module menu items. Select "Manage Targets" ~ "Print Targets to Scale" to open this module where you can either display and print a digital target that has been scored and tabulated or print a new targets of your choice to take to the range.
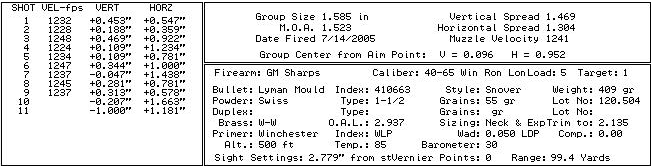
The page will open with the target marked with the shot coordinates, aim point and group center indicators. All load information, target information and shot coordinates will be displayed in the panels at the bottom of the target.
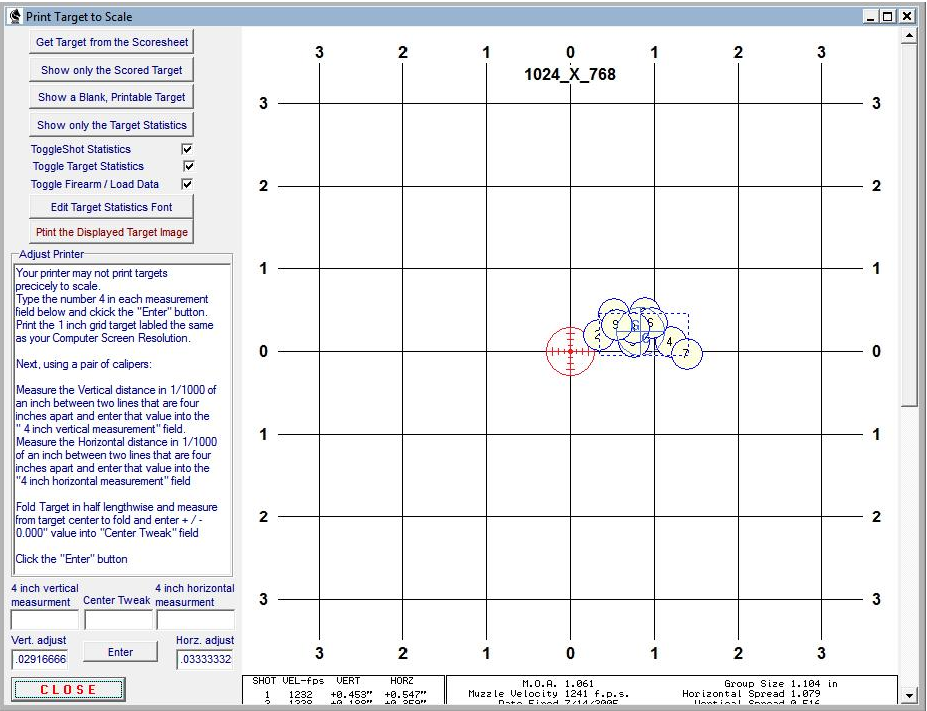
Some screen resolutions may hide the left portion of the target. Move the mouse to the right edge, left click and drag the edge to the right.
Use the scroll bar at the right of the page to move the view up or down as necessary to view all the target and information panels.
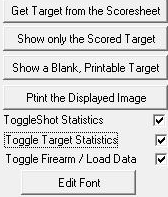
The target may be printed as a blank target, or as a complete target, with the images of the shot holes and load, target and shot information panels or any combination thereof. Use the buttons and check boxes to select the desired combination.
A method that works well is to print a blank target, take it to the range and fire a test group through a chronograph. Import the chronograph data, Open the Score Targets page, use the monitor to score the target and calculate the statistics. Smooth the target out and place it in the printer then print the Load, Target and Shot data panels onto the bottom of the target
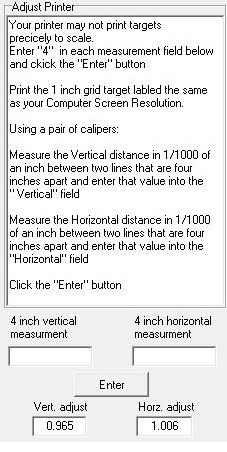
No two printers seem to print alike and need to be adjusted to print precisely drawn targets. To adjust your printer, enter the number 4 in the respective Vertical and Horizontal adjustment fields and enter a zero in the "Center Line Tweak " field. Next, print a target then, using a set of calipers, carefully measure the distance between two vertical lines that are close to 4 inches apart and enter the respective vertical and horizontal values into the Vertical and Horizontal Adjust fields.
Bring the left and right sides of the target together and carefully fold the target so that a crease runs down the exact center of the page. Now, using the calipers, measure the distance from the crease to the centerline of the target drawn on the page. If the crease is to the right of the centerline, enter the measurement as a positive value in the Tweak window. If the crease is to the left of the centerline, enter the measurement as a negative or minus ( - ) value.
Now print another target and the lines should be one inch apart and the target should be centered on the page. If all is not as it should be, just tweak your entries either up or down in 0.01" increments to draw a dimensionally accurate target.
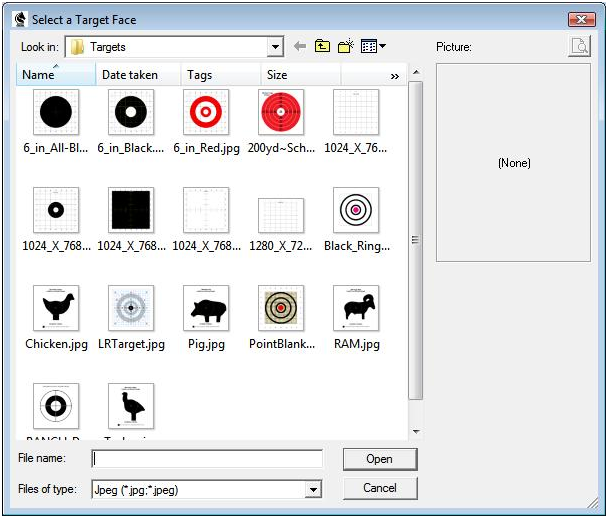
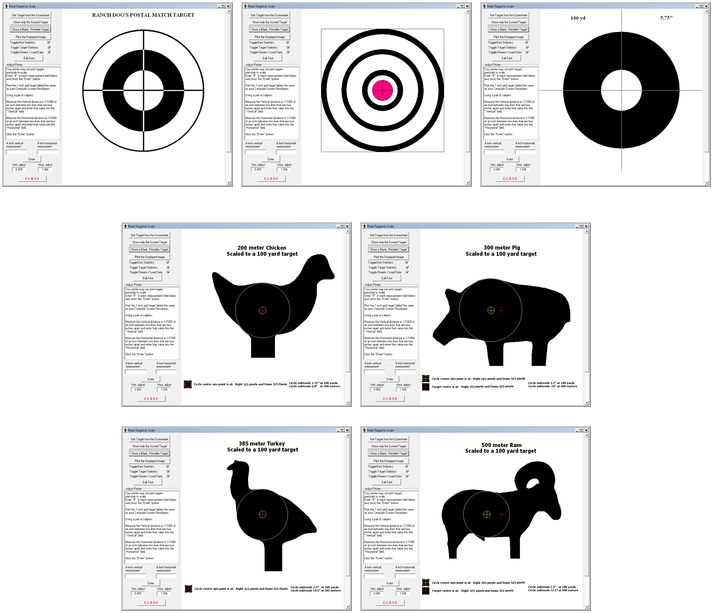
Various targets are included in the installation and are placed in the "Targets" folder. To print a target, go to the Score Targets page, click the vertical button marked "More Targets" and select one of the targets that are listed. Click the Print Targets button to open the Target Printing section and the newly selected target will be available for printing.
If you wish to make your own targets, Use a graphics drawing program such as Windows Paint and navigate to the Target folder in C:/Program files/TMT/Precision/AllNew/Prec_Rec/Targets/ (in 64 bit computers, the Program file folder is labeled as "Program Files(x86)" ).
Locate and open a grid target that is labeled with the screen resolution that your computer will and use those dimension to determine the measurements of a target that will work best with the screen resolution that you are using. Construct your target so the center is the same distance from the top of the target as it is from each side, and it will then have the center coinciding with the scoring screen.
When you are finished drawing the target, save it as a JPG file in the Targets folder.
All of the targets included with the software were constructed with the Windows Paint module and saved as *.jpg files.
Copyright © 2002- 2016. TMT Enterprises. All rights reserved. Modified June, 2016