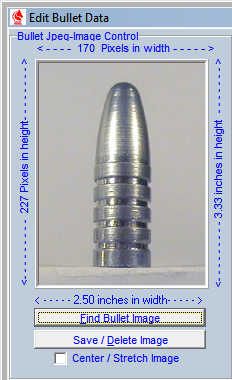
Bullet Image Control
An image may be stored and displayed for each bullet record stored in the three bullet databases. A good practice is to display images of the bullets that are in the Active bullet list and store images of bullets in the Cast Bullet and Jacketed Bullet databases in the folder provided at C:\Program files\TMT\Precision\BulletPics\. This will help maintain a lower file byte size in the databases .
All images must be in JPG format to be stored in the databases. That is, the name of the file must be a format that looks like this:
Filename.jpg or Filename.jpeg
The size of the image frame is 170 pixels wide and 226 pixels high. This translates into a dimension ratio of 3 units x 4 units and displays an image 2.00" wide and 2.67" high in a computer resolution screen ratio of 1024 X 768.
If a Jpeg dimension ratio is 3 x 4, the image will stretch or shrink to fit the frame with no viewing distortion when the Stretch / Center Picture checkbox is checked. If the image is dimensionally smaller than the frame, stretching will cause loss of image resolution, but if the image is larger than the frame, the image will shrink to fit the frame with little or no loss of definition.
Images that are considerably larger with a 3 x 4 dimensional ratio may be stored and viewed but will needlessly use file storage resources.
The process used to create the bullet images contained in the software is as follows:
1. Snap a close-up picture of the bullet with a digital camera, using a background and lighting setup that will provide a clear image.
2. Following the instructions provided with the camera's imaging software, load the picture into your computer's imaging software.
3. Use the software to crop, size and convert the picture to a 170 x 226 pixel, jpg format.
4. Save the image to the C:\Program files\TMT\AllNew\BulletPics\.
5. Use the method described below to insert the image into the viewing frame.
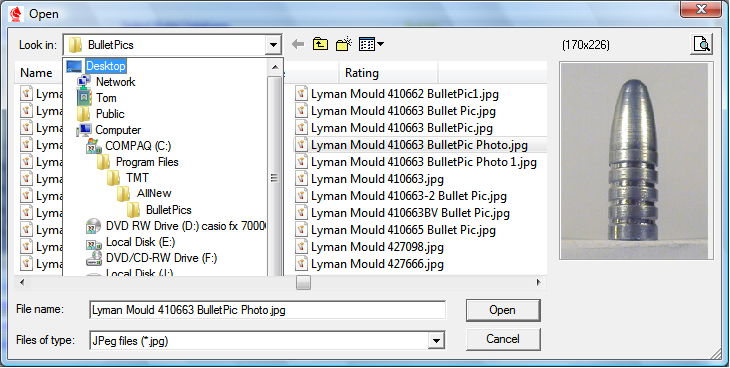
Windows Open File Module Method:
1. Use Windows installed imaging software to process and store the properly sized and formatted image to the bullet image storage folder located in C:\Program files\TMT\AllNew\Bullet pics.
2. Click the Find Bullet Picture button.
3. Navigate to the bullet image storage folder (C:\Program files\TMT\AllNew\Bullet pics) and select the bullet image.
4. Click the Open button to copy the image into the bullet image viewing frame.
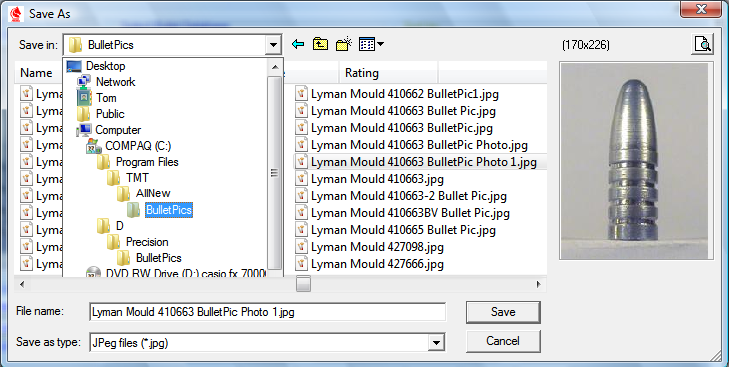
The Save / Delete Picture button will offer a means to save the bullet image to a file in the Bullet Pics folder and /or delete the image from the viewing frame. When the image is saved to the Bullet Pic folder, the file will be automatically named with the Vendor's name and index number
Copyright 2002-2010. TMT Enterprises. All rights reserved.